The hand-tied bouquet has enjoyed years of popularity in Europe, where florists automatically spiral the stems as the customer selects their blooms. They are now one of the most popular floral presentations. Hand-tied bouquets are perfect gifts as the flowers are already arranged and only need to be transferred to a vase.
You will need
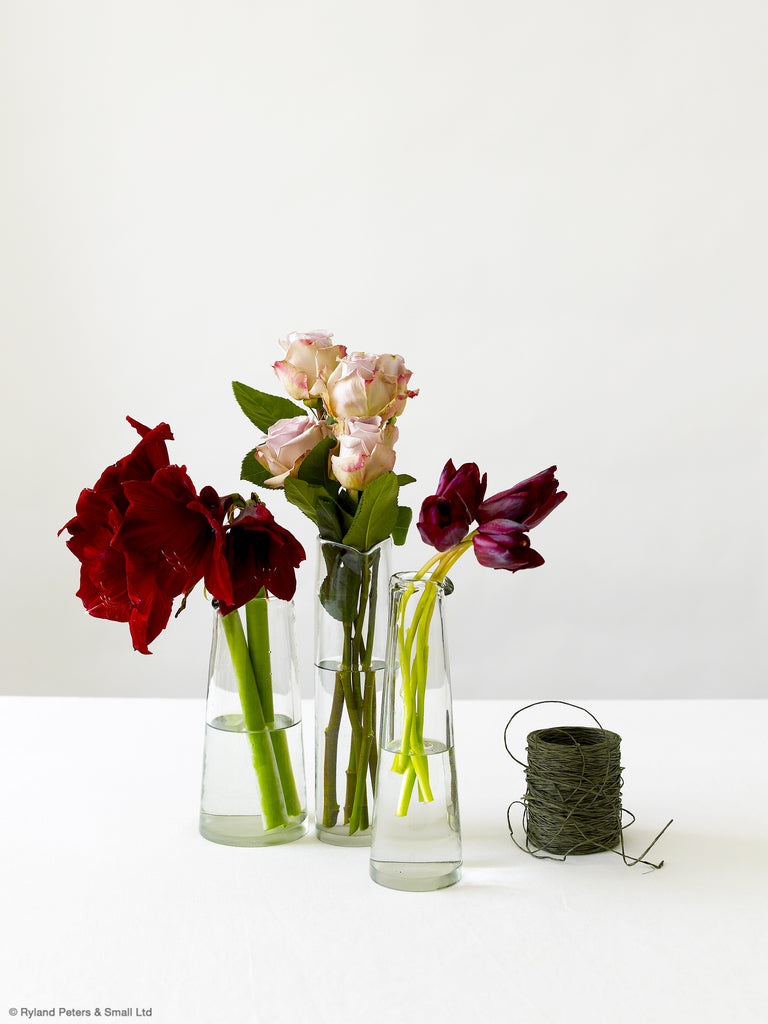
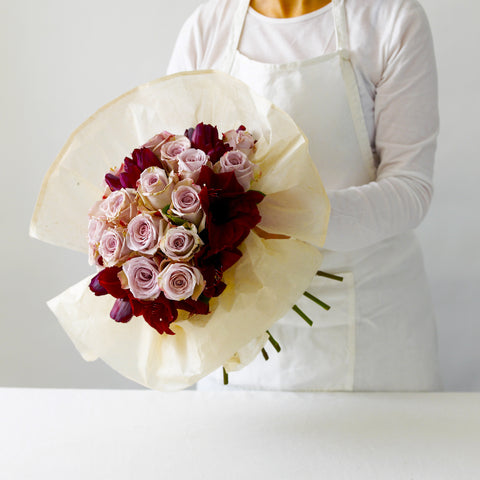
15 x stems Amnesia roses
3 x stems amaryllis
10 x stems Black Knight tulips
Reel/spool of twine
Paper to wrap bouquet
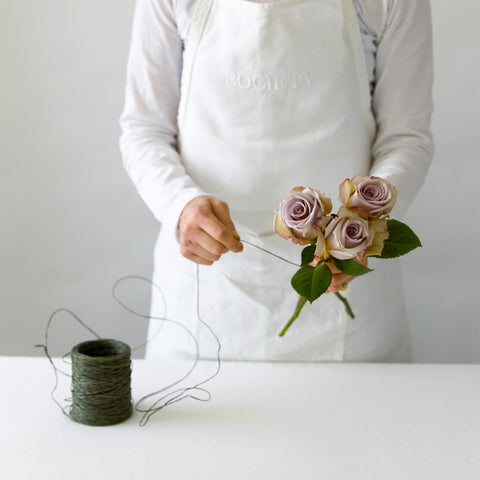
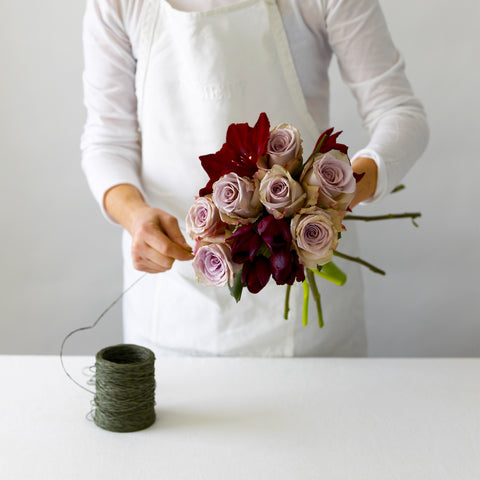
1. Take one large rose flower head as the central point of the bouquet and tie the twine to the stem of this flower at the binding point—about 8 inches (20 cm) below the head. Hold the flower in your left hand. With your right hand, cluster several heads around the first flower, one at a time, winding the twine around the stems and rotating the bouquet in a counter-clockwise direction as you do so. Build up a circle of flower heads around the central flower.
2. Begin to build up a second circle of flowers around the first. Slant the stems at a gentle angle to create a rounded shape across the top of the bouquet. Make sure you continue to bind the stems at the same point. For example, if you start with a binding point of 8 inches (20 cm) below the flower heads, you must continue binding at this point.
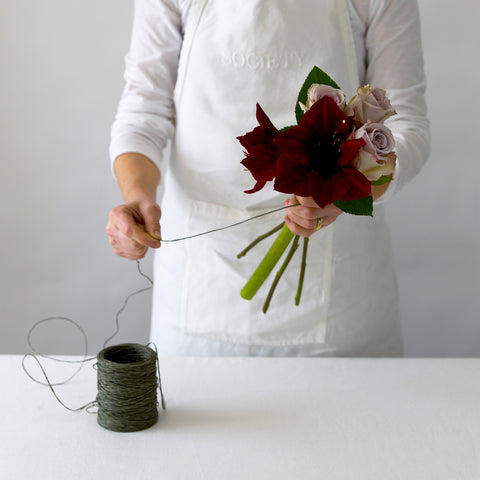
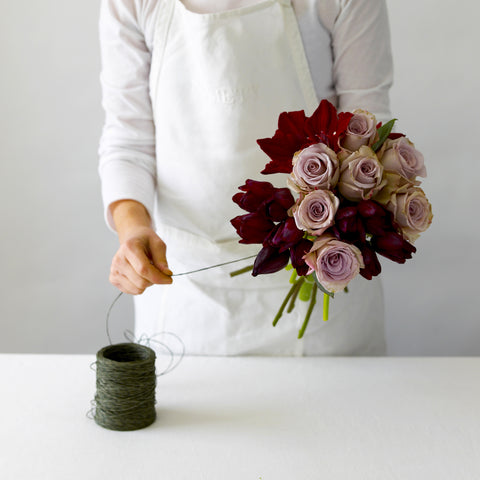
3. As you continue to add stems, rotating the bouquet counter-clockwise as you work, youwill see the bouquet of flowers gradually taking on an even, domed shape across the top.
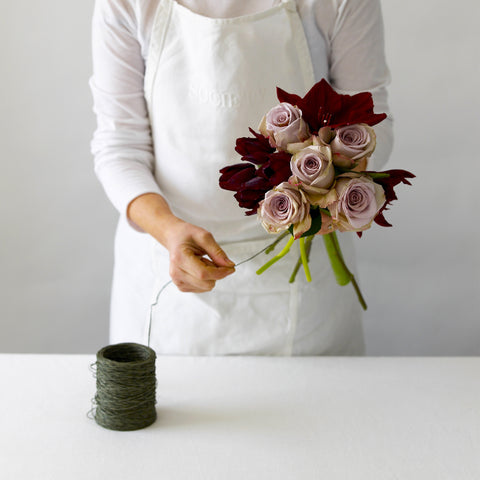
4. Continue to add material until the bouquet is the desired size or all the flowers have been used.
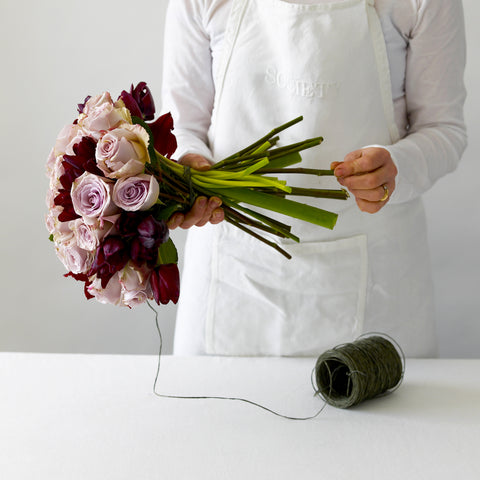
5. Wind the twine around the binding point several times, then tie in a knot.
6. Cut off the ends of the flower stems so they are even. Their length depends on the height of the bouquet—for example, if the binding point is 8 inches (20 cm), then you should leave an 8-inch (20-cm) length of stem beneath this point.
7. Gather together a length of tissue and wrap around the stems, making sure that the two ends of the tissue are the same length where they meet.
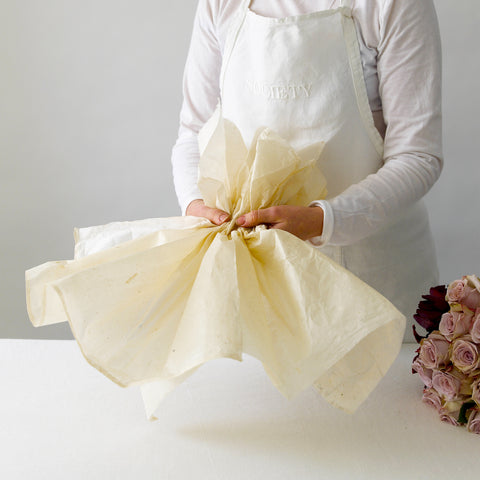
8. Tie the tissue in place at the binding point or “waist,” making sure it covers the stems. Here, I used soft cream tissue to enhance the flowers and add to the overall size and impact of the bouquet.
Discover more in Jane Packer's Flower Course. To get more great blog posts like this one - direct to your inbox – be sure to sign up to our mailing list here.